How to save pictures from Lightroom mobile?
You spend hours tweaking sliders to craft the perfect edit. The colors pop, and the lighting is absolutely flawless. Now you need to get that masterpiece out of the app. Understanding how to properly export your photos is a fundamental skill for every modern digital creator.

Why save images outside the application? Beyond web galleries, you might want to share photos directly with clients or upload them to social media. Many photographers also export files to order professional prints from labs or simply open them in other editing software like Topaz.
There is no need to let these exported copies permanently clutter your hard drive. You can always save a fresh copy from the cloud whenever you need it. Let’s dive into navigating Adobe Lightroom mobile and desktop so you can easily share your art with the world.
The Quickest Way to Save Photos to Your Mobile Device
Sometimes you do not need complex settings. You just need a finished image on your phone right now to text to a friend. The “Save copy to device” option is the absolute fastest way to get this done.
If you are working with a single photo, open the photo you want to export in loupe view, select Share, and then select Save copy to device. If you want to save a whole batch of edits, go to the Grid view and long-press a photo to bring up multi-select, and select one or more photos. Select Share and then select the Save copy to device option from the pop-up menu.
The app will prompt you with an image size dialog where you select one of the following options:
- Small (2048 px): Limits the length of the exported JPG photos to 2048 pixels. The breadth is scaled accordingly to maintain the original aspect ratio.
- Maximum available: Exports the selected photos in the highest available quality in JPG format.
Once the edited image is exported, it will be denoted as a badge on the top left corner of the photo in the device view. This little visual cue is incredibly helpful, so you know exactly which edits made it to your camera roll.
If you want to export your saved pictures in the highest possible quality without premium restrictions, download the Lightroom Mod APK.
Mastering Custom Export Settings for Maximum Quality
Quick saves are fantastic, but professional work requires ultimate precision. You need total control over file sizes and color profiles when sending work to clients or print labs. Open Lightroom on the mobile app, select the photo you want to export, tap the Share icon, then select Export as… from the menu.

Choosing Your File Type
Different platforms require different file architectures. You can export edited photos as JPG, AVIF, DNG, TIF, or original. Modern updates also allow you to export as JXL. If the latest app update is crashing every time you try to save a picture to your gallery, try installing a stable Lightroom old version.
Controlling Dimensions and File Size
Smartphone cameras generate massive files. You can control the exact pixel count of your exports to save storage space. These dimension options are applicable for JPG and TIF file formats.
| Dimension Setting | What It Does |
| Largest Available Dimensions | Exports the selected photos in the largest available dimension in JPG and TIF format. |
| Small (2048 px) | Limits the length of the saved JPG and TIF photos to 2048 pixels. |
| Custom | Applies the specified pixel value to the long edge of the photo and uses the original aspect ratio of the photo to calculate the other edge. |
Keep in mind that the long edge value can’t exceed 15,000 pixels when using the custom setting on mobile.
Fine-Tuning Quality and Data
If you select JPG, choose an option from 10% to 100%. Professional printers usually prefer TIFF files; if you export a TIFF, choose the bit depth of 8 bits or 16 bits. You can also choose from ZIP or LZW as the compression method if you want the exported photos to be compressed.
Do not forget to set your output sharpening based on the medium in which you want to view the photo(s) and the amount of sharpening you want. You should also choose a color space based on the intended output.
Next-Gen Displays: Exporting HDR and Gain Maps
Display technology evolves rapidly, and High Dynamic Range (HDR) screens are becoming standard. Toggle the switch in JXL and AVIF to include HDR data. The export process is slightly different on a desktop computer, so be sure to check our guide on Lightroom for PC if you are switching devices.
Standard JPG files can also store HDR data using a Gain Map. Gain Map provides a solution for a consistent and adaptive display of HDR images. Conceptually, this method combines both SDR and HDR renditions within a single image and interpolates between the two dynamically at display time.
Protecting Your Art with Custom Watermarks
Image theft is a real problem for digital artists. Adding a visual signature protects your hard work from unauthorized sharing. In the export settings, turn on the Include Watermark option to include watermark text or graphics in your exported photos. Make sure you export and save all your cloud-synced pictures to your device before you cancel your Adobe Lightroom subscription so you don’t lose your hard work.
Adding a Text Watermark mark
Adding simple text is the fastest way to claim ownership of an image. Select Customize, and on the Customize Watermark screen, select the Text tab. Select the text field to modify the watermark text as required. By default, the watermark text displays a copyright symbol followed by your Adobe account name.

You have total creative freedom over the design:
- Select T to choose a font.
- Select B to make the text bold.
- Select the desired color swatch to choose a text color (black or white).
- Turn on the Use Drop Shadow option to apply a drop shadow to your watermark text.
To position the watermark, select any of the nine placement circles displayed around and at the center of the image. Move the opacity slider control to adjust the watermark text’s transparency level. Move the horizontal offset and vertical offset sliders to position the watermark text from the selected placement circle.
Adding a Graphical Logo
Lightroom for mobile (iOS) now supports graphical watermarks, which you can add while exporting or sharing your photos.
On the Customize Watermark screen, tap the Graphic tab. Select the folder icon to choose a file that you want to use as a watermark.
Ensure that your PNG or JPG file has a transparent background to get a seamless graphical watermark on your photo. You cannot upload a watermark that is larger than 5 MB. Use the sliders to adjust the size, opacity, and set horizontal and vertical offsets to position your watermark.
Sharing Directly to Apps and Social Media
If you’re in Loupe view, select Share, and then select Share To. In the next dialog that appears, you’ll see a list of installed apps you can use to share your photos select an app and follow the onscreen instructions.
Starting with Lightroom for mobile (Android) version 10.1, you can share directly to Instagram by selecting the Share icon > Send to Instagram. If you have HDR turned on while sharing directly to Instagram, the app will include the HDR information in an AVIF file and send it to Instagram.
Showcasing Your Editing Process
Quickly create short videos of your editing process and share the replay video with other people. Once you’ve made the edits to an image, select Share and select Create edit reply. Lightroom will automatically create a short video of the editing process of an edited photo in Lightroom on mobile. Share your edit replay videos on social media and tag @Lightroom for a chance to get featured.
Collaborating with Shared Group Albums
A group album is an easy way to share images with friends and family. You can create a web link for your group album, share it, and then keep editing images. The shared album will always have the latest edits and pictures, as the pictures are stored in the cloud.
Setting Link Permissions
Select an existing album, then select the Share & Invite icon. Select Get shareable link to receive a link to your shared album.

The Link Access field is set to Invite Only by default. This creates a private link that only members whom you invite can view or contribute to in your album. Alternatively, change the Link Access setting to Anyone can view to create a public link, where anyone with the link can view your album.
Managing Invites and Roles
To invite others to view or contribute to your album, enter their email addresses in the Invite section and select Invite. Next to each email address, click the drop-down list to set the album access setting of that person:

- Can View: The invitee can view the shared album, add comments in photos, and mark them as favorites.
- Can Contribute: The invitee can add photos to the shared album, add comments in photos, and mark them as favorites.
- Can Edit and Contribute: The invitee will be allowed to add photos to the shared album and make photo edits.
Exporting Photos from Lightroom Desktop
The desktop app offers a familiar but powerful export workflow. In the Share menu, you can find preset options to quickly export your photos by selecting JPG (Small), JPG (Large), Original, or Previous Settings.

If you want to access more export options, click Custom Settings. You can also press Shift+E to view custom settings for exporting photos. From here, you can set custom dimensions (where the edge value can’t exceed 65,000 pixels) and fine-tune output sharpening.
Publishing to External Connections
Lightroom allows you to share selected photos or albums and publish your creative work as an online project to services such as Adobe Portfolio, Blurb, and WHCC. If you have an entire album of vacation photos, it is incredibly efficient to apply your settings and batch edit in Lightroom before saving.
Click the Sharing icon from the left pane, and in the Sharing panel, select the Add Connection option under Connections. From the list of online services, select the one that you want to connect to and click Add Connection.
Troubleshooting Common Mobile Export Errors
Lightroom allows you to retry saving your photos if the export process fails. Here is how to fix the most common error messages:
- No Internet connection: Ensure that your device is connected to the Internet. Switch back to Adobe Lightroom for mobile and tap Retry.
- Not enough storage to perform export: Free up some storage space in iOS Photos or your device’s gallery. Switch back to Lightroom on mobile and select Retry.
- Lightroom does not have permission to save photos. Provide permissions to Lightroom on mobile in your device settings. Switch back to Lightroom on mobile and select Retry.
Frequently Asked Questions
Why can’t I save my photos to my camera roll? You likely need to free up physical storage space on your device. Also, check your phone’s main settings to ensure Lightroom has permission to save photos to your gallery.
What are the best export settings for Instagram? Export your image as a JPG and select the small (2048 px) dimension setting. This prevents Instagram from applying its own aggressive compression algorithms to your photo.
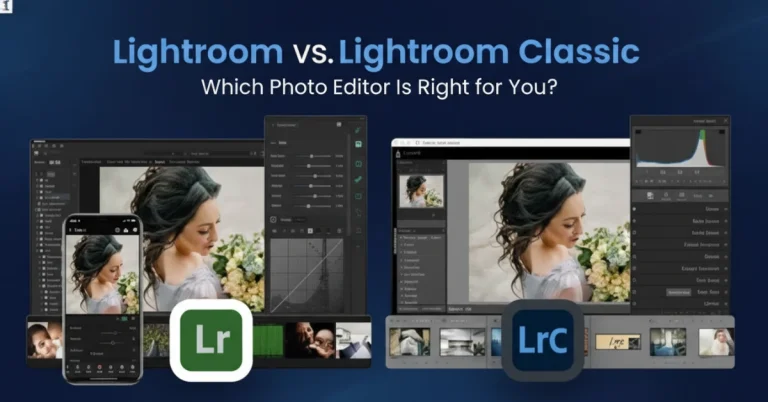
How do I export RAW files from the mobile app? Open the Export as menu and change the File Type to DNG. This saves your photo as a lossless digital negative. Mobile users save pictures directly to their camera roll, but understanding the differences between Lightroom vs Lightroom Classic explains how desktop file management works.
Can I add a logo watermark in Lightroom mobile? Yes. Go to Export > Include Watermark > Customize and tap the graphic tab. You can upload any transparent PNG or JPG file that is under 5 MB.
Will I lose my edits if I delete the app? Edits synced to the Adobe Cloud are safe, but you will lose any unsynced work. Always use the “Save copy to device” option to back up your photos locally before deleting the app.
conclusion
Getting your photos out of the Adobe ecosystem does not have to be a headache. You now know exactly how to manage your file sizes and protect your art with custom logos. You can easily text a quick edit to a friend, or you can export a massive TIF file for a high-end gallery print.
Take a few minutes to set up your favorite export Lightoom presets right now. This simple step will save you countless hours in the future. Your photography deserves to be seen by the world, so get out there and start sharing your amazing creations!